Splitting a library over multiple hard disks
Generally, Aspect only allows a library instance to contain photos from the same drive where the library catalog is stored. However, with todays RAW image and video sizes it is easy to run into the situation where a single hard drive is not sufficient to hold all files.
Now, a good solution to this is the use of a NAS system that allows to dynamically combine multiple hard disks to a single, large virtual drive (e.g. using RAID, ZFS or BTRFS internally). However, those can be expensive and also have a drawback that can be important for the daily work of photographers — you cannot take one of the drives with you if you need them on the go.
The alternative solution that Aspect offers is based on its synchronization functionality, which cannot only be used for synchronizing between network devices, such as multiple computers, mobile phones or servers, but also for local hard disks.
Choosing the right scheme for managing the drive contents
At the time of writing, Aspect supports two main modes for deciding which photos are stored on which hard drive.
Manually:
By setting the storage mode for a drive to MANUAL SELECTION, only the files that are already in a scanned folder on that drive, or are manually marked to be stored, will stay on that drive during the synchronization process. This allows full control over how the photos get distributed over the different hard disks.
Date range based:
This mode lets Aspect to the work of figuring out where to store the photos. Each hard disk will only store photos within a specific date range (as well as manually marked or scanned photos). Choose the RESTRICT TO DATE RANGE setting in this case and choose an appropriate range, for example drive 1 going from January 0 to December 2010, drive 2 from January 2011 to December 2020 and drive 3 from January 2021 to December 2030.
Now any newly added photos will automatically stay on drive 3, whereas older photos will be distributed to the other two drives. Of course, you can also have hard drives with other synchronization modes, such as an external drive that uses the "LIMIT MAXIMUM AGE" setting and always stores the photos from the last 12 months.
Setting up a library for an existing set of hard disks
- Add device to library
- Configure storage settings
If you already have a setup with multiple hard disks that contain the photos, the first step is to create an initial library on one of the drives:
- Open Aspect and choose File → Create new library… in the menu bar, or click Create new Library on the welcome dialog
- Choose the folder on the hard disk that contains the photos as the scanned folder
- Review whether the default library name and folder organization structure matches your preferences and use the Customize button if necessary
- Click the Create library and wait for all photos to be scanned
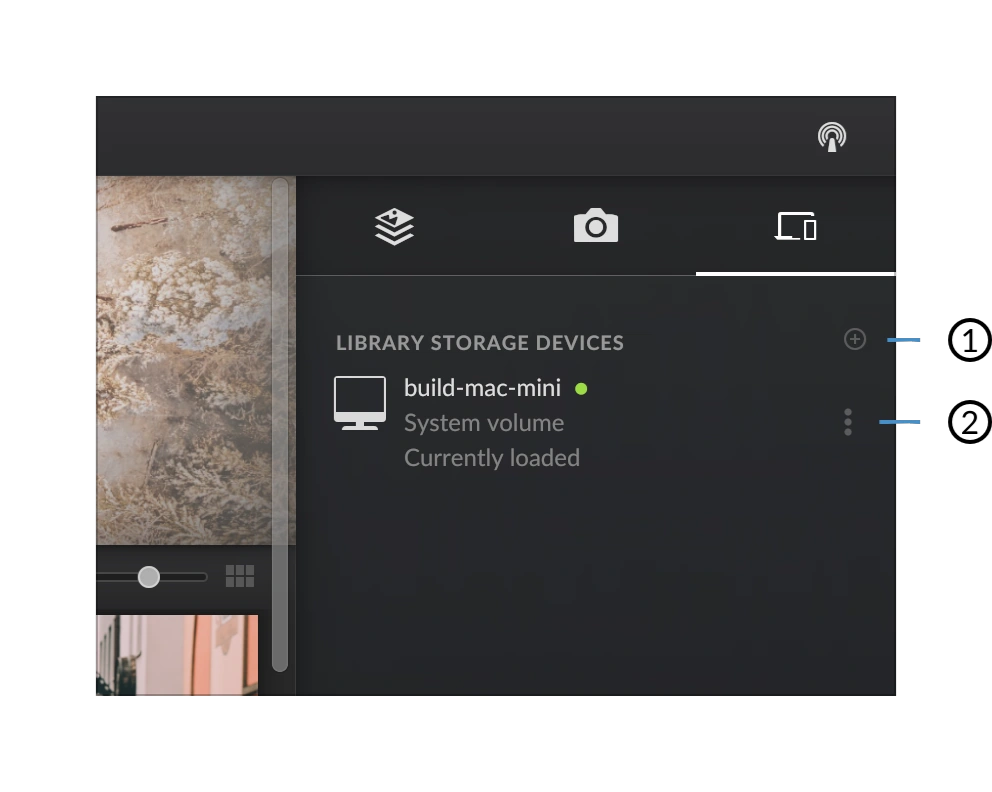
- Once the new library is open, open the synchronzation pane on the left side of the application window, denoted by the laptop/mobile phone icon - you should see a single entry with the name of your computer and the name of the hard disk
- Click the next to this entry and choose Configure…
- Under STORAGE SETTINGS, choose the mode appropriate for your setup - see the previous chapter
Now you just need to add each of the other drives in a similar way:
- Click the at the top right of the synchronization pane and choose External drive or NAS
- On the new drive, create and choose a folder where the Aspect library is going to be stored
- Set the STORAGE SETTINGS as appropriate
- Click Start synchronization and wait for the process to finish
- Go to Library → Switch Active Library Instance and choose the entry corresponding to the new drive
- Open File → Add Folder(s) to Library
- Add a check mark on the folder that contains the photos
Adding a new hard disk to an existing library
In case you are running out of space and need to add a new hard drive, you'd take a similar approach, except that scanned folder don't need to be set up. First, the question is whether the new hard disk is supposed to be used for new photos, with all old photos staying on the existing drive, or whether it should act as an archive drive to free up some space on the existing one.
Using the existing drive as an archive drive
First, set up the existing drive to store only photos up to the current date:
- Open the synchronization pane, click the next to your existing hard disk entry and choose Configure…
- Under STORAGE SETTINGS, choose RESTRICT TO DATE RANGE
- Change the Last month date to the current month and year
Then, add the new drive to the library:
- Click the at the top right of the synchronization pane and choose External drive or NAS
- Create and choose a new library folder on the new drive, or select the drive itself if the Aspect library is going to be the only thing stored there
- Under STORAGE SETTINGS, choose RESTRICT TO DATE RANGE
- Change the "First month" date to the month following the "last month" set for the existing drive
- Click Start synchronization and wait for the process to finish
- Go to Library → Switch Active Library Instance and choose the entry corresponding to the new drive - this will be your new main library instance to which you import new photos
Using the new drive as an archive drive
This approach might be necessary, for example when the existing hard drive is built into the computer and the new drive is an external drive. You'll start by restricting the photos that are stored on your main drive to that current month and up (or any other appropriate date):
- Open the synchronization pane, click the next to your existing hard disk entry and choose Configure…
- Under STORAGE SETTINGS, choose RESTRICT TO DATE RANGE
- Change the First month date to the current month and year
Then, add the new drive to the library:
- Click the at the top right of the synchronization pane and choose External drive or NAS
- Create and choose a new library folder on the new drive, or select the drive itself if the Aspect library is going to be the only thing stored there
- Under STORAGE SETTINGS, choose RESTRICT TO DATE RANGE
- Change the Last month date to the month preceding the "first month" set for the existing drive
- Click Start synchronization and wait for the process to finish - this is going to take a long time, as all existing photos need to be transferred to the new drive first
After the initial synchronization is finished, Aspect will automatically start a new synchronization in the background that will remove any old photos that are now stored on the new drive from your old drive, freeing up space for new photos.