Importing Photos
Importing your photos into the photo stream is the recommended way of getting your photos into Aspect. The photo stream acts as an inbox where all new photos are initially collected. From there you can create events or you can add your photos to some of your collections.
Combined with the fact that the actual copying of the files happens in the background, this allows the import process to become an almost invisible part of the work process, especially with the auto-import feature.
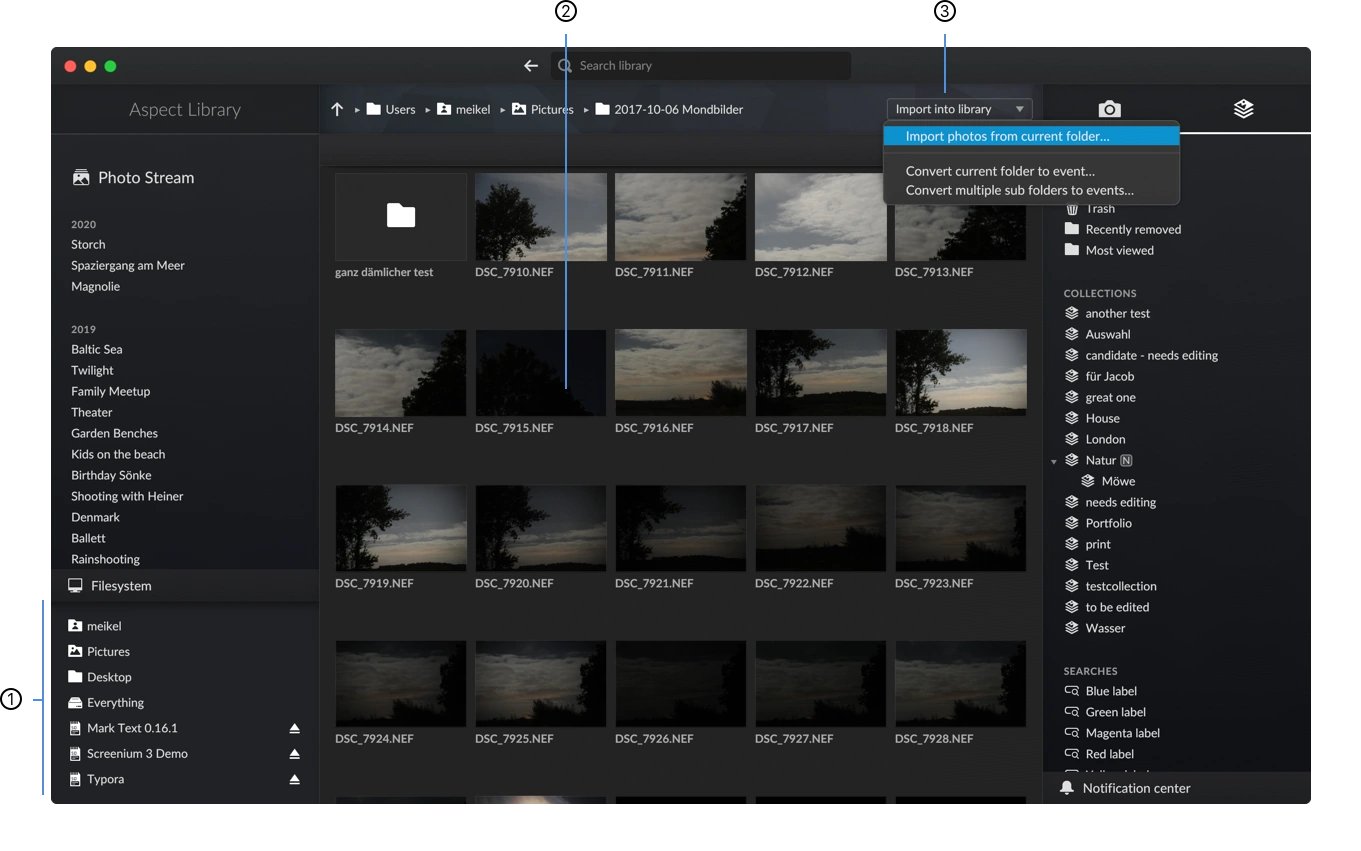
Opening the import dialog
- File browser
- List of thumbnails
- Import button
To start importing photos from a certain folder or volume, there are two possibilities:
- By going through the Filesystem pane ❶, open the folder in the file browser ❷ and use the Import into library button ❸, choosing the Import photos from current folder… option
- On macOS, choose File → Import photos… in the menu bar and then select the folder to import
- On Windows and Linux, choose ≡ Menu → Import photos…
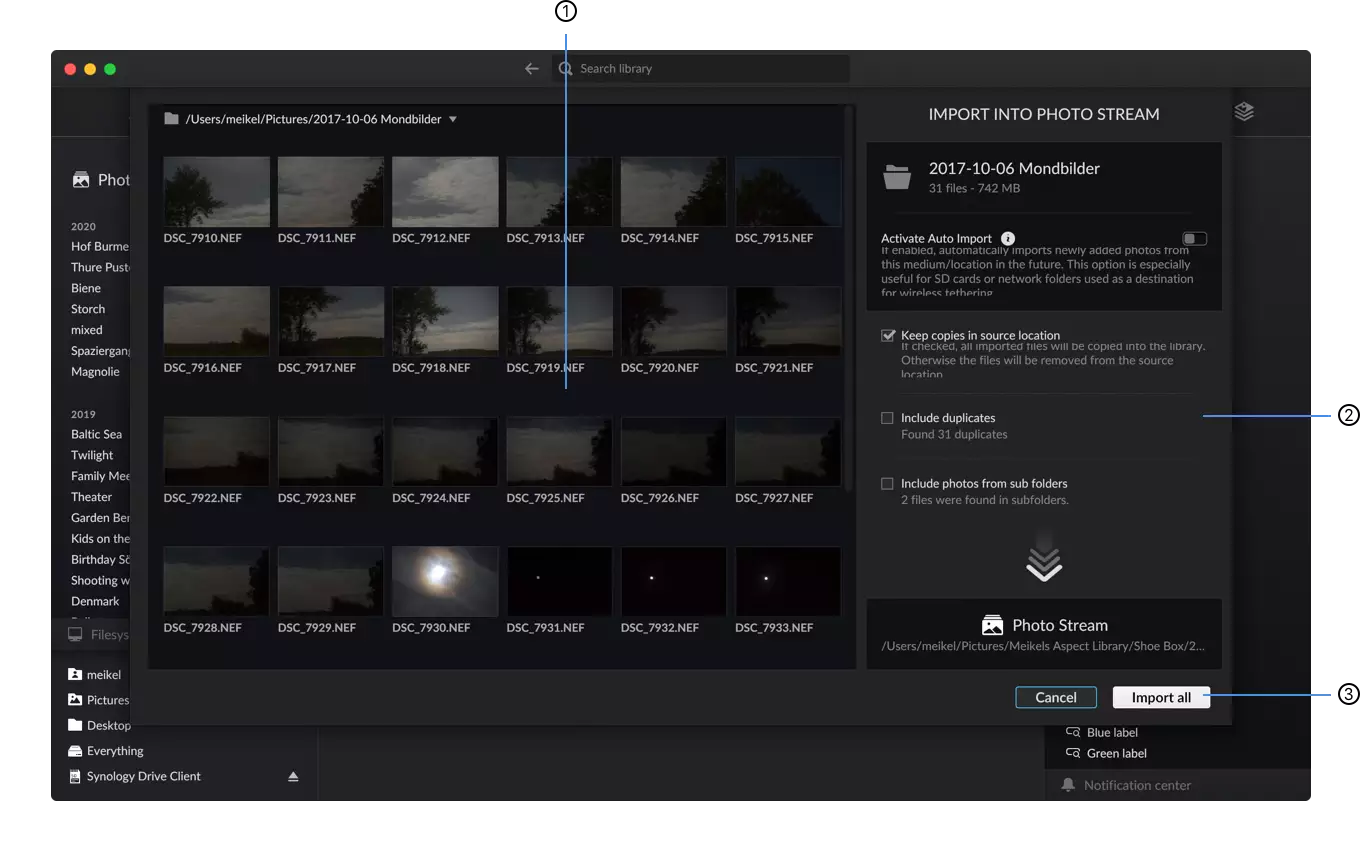
Configuring the import
- Thumbnails
- Import options
- Dialog buttons
The import dialog provides the following options to control how and which files get transferred into the library:
Activate Auto Import
Enables automatically running the import with the same settings whenever new files get added to the folder, or when the storage gets reconnected to the computer - see Auto Import
Keep copies in source location
Enabling this option leaves all imported images as copies in the source folder. Otherwise the imported files are removed from the source folder.
Include duplicates
By default, all files will be checked against the ones stored in the ..........library duplicates (bit identical copies) in the library and will only be imported if they don't already exist. Aspect is doing a duplicate check while scanning the photos. This duplicate check is especially helpful when you bring your old library into Aspect. But it is also a good feature when you insert your memory card again with your old photos still on it.
Include photos from sub folders
This options allows you to not just import files from the current folder itself, but also from all of its sub folders. Note that the folder structure of the imported files will not be preserved.
You can use the thumbnail pane ❶ to select only a subset of photos for import. An Import selection button will appear in addition to the Import all button in this case.
Note
Aspect currently does not support AVCHD directories that are used mostly by entry-level cameras for storing videos. If you have such folders, it is recommended to use a video conversion software to convert them into normal video files before importing them.
However, the AVCHD directory can also be moved as a whole into an event folder directly using Finder/Explorer and will still be tracked as part of the library.
Starting the import
Once all settings are set correctly, the import can be started by clicking the Import all (or Import selection) button at the bottom. The photos will appear almost instantly in the photo stream and you can start viewing or organizing them. Files that have not yet been fully transferred display a ⭳ symbol in their upper left corner.
The progress of the copy operation is tracked in the notification center ❶. Once the transfer is done, you may remove the source volume.
Note
If the application gets closed while an import is still in progress, it will attempt to continue the import at the next start.
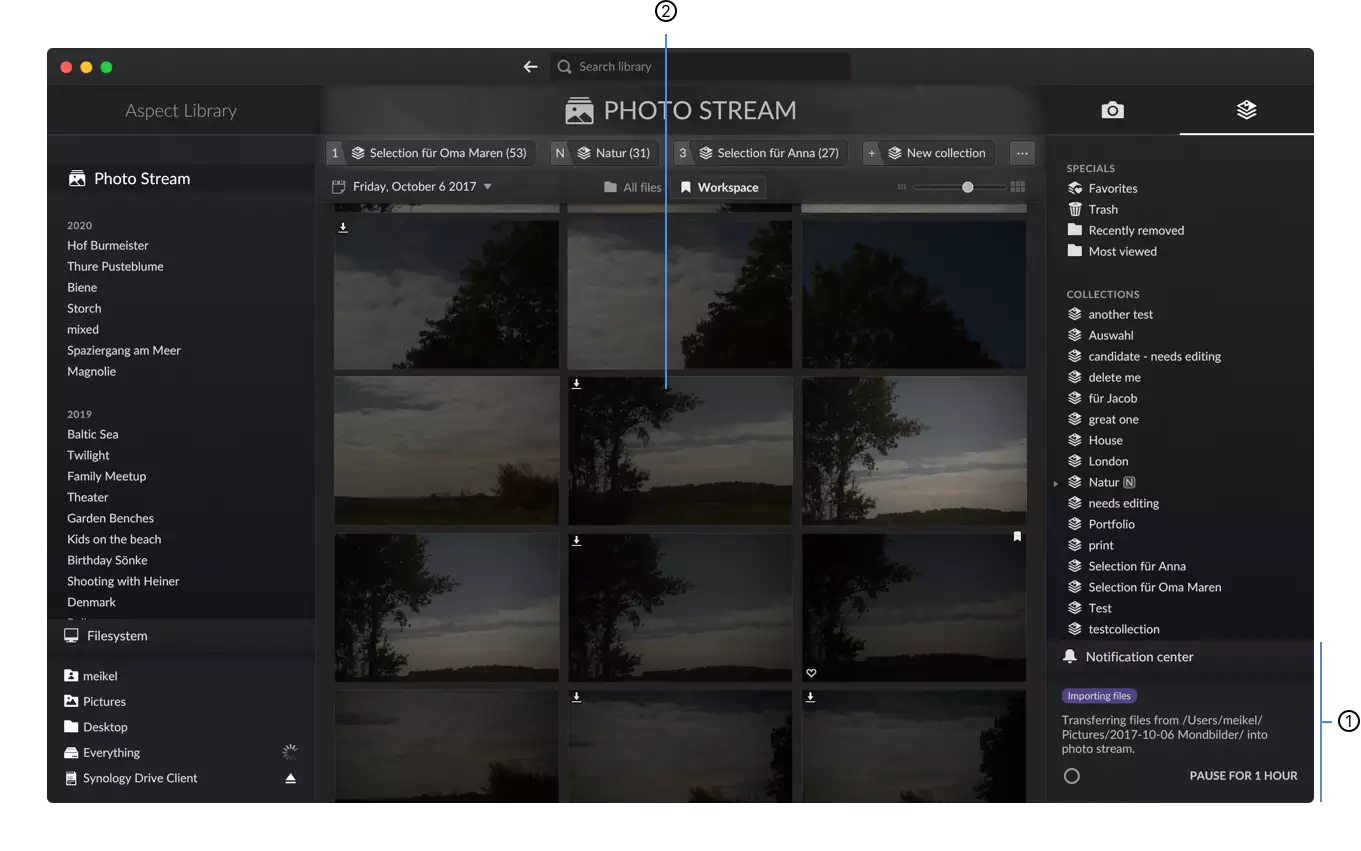
- Notification center
- Photo stream